Advertisement
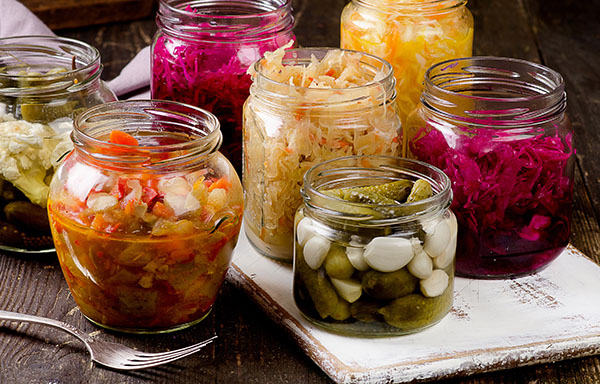
Salt fermentation is one of the safest and oldest forms of food preservation that you can use to turn your garden vegetables into super healthy sources of probiotics.
When you make salt-brined pickles or turn cabbages and radishes into kimchi, the salt you use can limit the growth of unwanted microorganisms, protecting your produce from spoilage. At the same time, fermentation allows probiotic microorganisms, such as Lactobacilli acidophilus, to flourish.
Once the fermentation process is done, you can repack fermented vegetables into clean jars and store them in your refrigerator for at least four to five months. Fermented vegetables not only become shelf-stable, they also acquire a new, tangy taste and become even more nutritious.

Here are some fermenting guidelines shared by Sandor Katz, author of two authoritative books on wild fermentation, which involves encouraging the growth of beneficial probiotic bacteria like Lactobacilli with the help of salt.
Your veggies. Use only fresh, organic produce that has been thoroughly cleaned. The best vegetables to ferment are cabbage, carrots, cauliflower, cucumbers, garlic, kohlrabi, peppers, radishes, snap beans and turnips. Whole pickling cucumbers normally ferment on their own, but other veggies can be fermented in glass jars, on their own or in mixtures. (Related: A basic guide to fermentation for the smart homesteader.)
Your fermentation salt. Use an appropriate amount of salt, which can be quite a challenge to measure until you get the hang of things. In general, the goal is to use about two tablespoons (34 grams) of non-iodized salt per quart.
When choosing salt for fermenting vegetables, avoid salts with anti-caking agents that can give a bad taste to fermented vegetables and added iodine because the addition of iodine can inhibit beneficial bacteria and disrupt fermentation.
The best salts for lacto-fermentation are pink Himalayan salt (considered one of the purest salts on the planet), unrefined sea salt, fleur de sel and gray salt. Pink Himalayan salt and gray salt are both rich in minerals. When using gray salt, look for black-, grey-, pink- or red-colored spots, which indicate that the minerals have not been removed from the salt.
Fermenting vegetables in small batches
To start a batch, chop or slice vegetables into bite-size pieces and place them in a large bowl or pan. Sprinkle with salt and massage the salt into the veggies for at least five minutes. Feel free to add spices for color and flavor, such as caraway or fennel seeds, chili powder, ginger and turmeric. Place the veggies in a wide-mouth glass jar and press down with your fingers. Leave at least two inches (5 cm) between the salted veggies and the top of the jar.
Next, fill a clean plastic sandwich bag with cool water and stuff it into remaining space in the jar. The water-filled bag will serve as a weight and an airlock. As fermentation progresses, gases will “burp” along the edges of the plastic bag. You will want to catch any liquid with a plate.
The next day, stir the mixture a bit with a clean spoon and add a small amount of filtered water if needed to completely cover the fermenting vegetables with liquid. Then press down the veggies and replace the water-filled sandwich bag. Repeat this drill daily, and don’t worry about funky smells, especially when fermenting cabbage or radishes. Days three to six tend to be quite aromatic, though the water-bag method goes a long way toward minimizing fermentation odors.
After five days, start tasting the fermenting vegetables to see how you like them. Refrigeration will bring fermentation to a standstill, but you don’t want to stop fermentation too soon. Three days in, the flavor of the food may have begun to change, but the fermentation process should continue until the “tangy-sour” stage before the food is ready for long-term storage. Fermentation may take three weeks in a cool basement or five to seven days in a typical kitchen.
Learn more about other food preservation techniques at FoodStorage.news.
Watch the following video to learn how to make easy homemade probiotics by fermenting vegetable.
This video is from the Daily Videos channel on Brighteon.com.
More related stories:
Germination and fermentation – The secret to easily digestible grains.
12 Food preservation and food storage techniques you can use when SHTF.
Sources include:


Advertisements
Food.News © 2023 All Rights Reserved. All content posted on this site is commentary or opinion and is protected under Free Speech. Food.News is not responsible for content written by contributing authors. The information on this site is provided for educational and entertainment purposes only. It is not intended as a substitute for professional advice of any kind. Food.News assumes no responsibility for the use or misuse of this material. Your use of this website indicates your agreement to these terms and those published on this site. All trademarks, registered trademarks and servicemarks mentioned on this site are the property of their respective owners.