Advertisement
Learning how to properly dehydrate food at home is a crucial skill because it teaches you how to be self-sufficient. If you’re a beginner when it comes to food dehydration, brush up on important information like different food dehydration methods, tools you’ll need and which methods suit which kinds of food best.
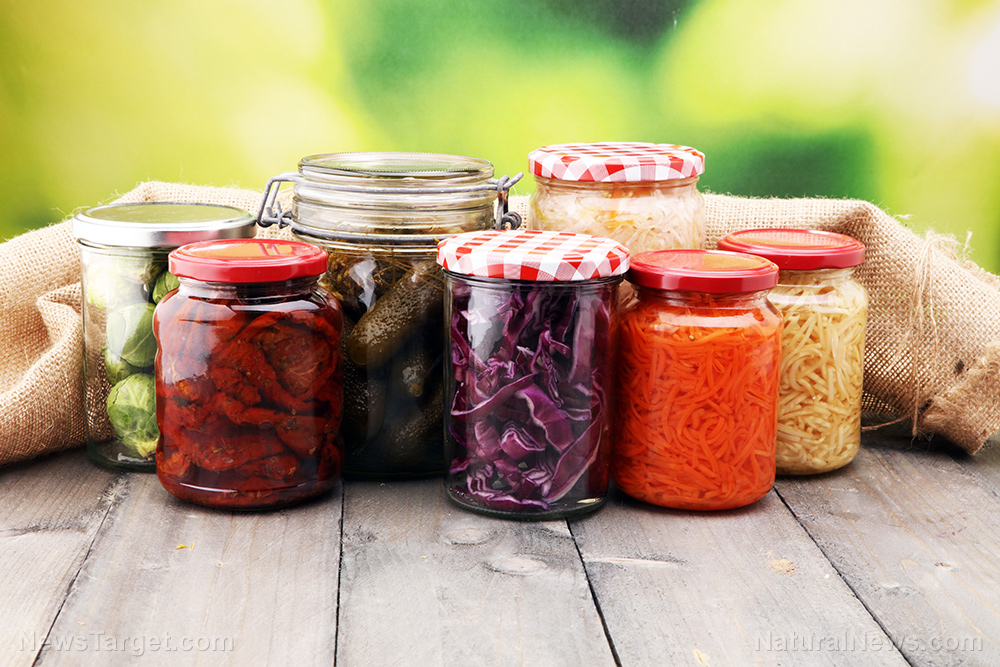
Food dehydration offers many benefits, such as saving on groceries, giving you access to off-season produce all year round and preserving excess harvest from your home garden.
Additionally, it can significantly lighten your gear if you often go hiking or camping. Dehydrating food reduces its moisture content to only five to 20 percent. Doing this ensures that the bacterium that causes food spoilage can’t survive. Removing moisture from food also helps extend their lifespan.

Different food dehydration methods
Below are some of the most common food dehydration methods.
Sun drying
Sun drying is one of the oldest and simplest ways to preserve food. If you want a method that doesn’t require too many tools, try sun drying.
You’ll need clean racks or lines and long periods of hot sun. Use this method if your location has a minimum temperature of 86 F and relative humidity of 60 percent. Note that fruit needs to be left in the sun for several days to dry thoroughly.
Use a mesh screen, avoid galvanized materials and cover the mesh with a second screen to keep out flies and other insects.
Solar drying
Think of solar drying as the upgraded version of sun drying.
This method uses a dehydrator powered by the sun to passively dry food. Solar drying is ideal if you want an eco-friendly way to preserve food since it doesn’t require electricity!
Solar dryers work outdoors and they often look like a mini tabletop greenhouse. You can build one yourself by checking out guides online.
Air drying
Air drying is another traditional method of food dehydration. But while sun drying requires sunshine, you need shade for this method.
Air drying helps preserves anything that needs protection from the sun’s rays, such as delicate greens and herbs for culinary mixes or herbal teas.
Oven drying
Oven drying requires a home oven to slowly dry food at temperatures of around 140 F. If you’re trying to cut your expenses, learn how to use an oven for food dehydration so you won’t need to buy a dehydrator.
Before you start drying food in your oven, check if your oven goes low enough. If it goes over 140 F, it will cook your food instead of drying it.
Electric dehydrating
This modern method uses electric dehydrators that have fans and other features that will quickly and efficiently dry food. Modern electric dehydrators come with a temperature gauge and adjustment dial that will help speed up or slow down the drying time, depending on what you’re processing.
Note that food dehydrators with a fan are noisy, so use them in your garage if noise is going to be an issue.
Foods to dehydrate
Fresh foods can be dehydrated, but some items dehydrate better than others.
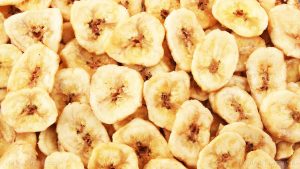
- Fruits – Apples, apricots, bananas, blueberries, cherries, cranberries, grapes, kiwis, oranges, peaches, pears and strawberries can be eaten as snacks or used to make trail mix.
- Vegetables – Beans, beets, carrots, celery, mushrooms, onions, peas, potatoes, tomatoes and turnips are great for soups and stews or for camping and backpacking meals.
- Herbs – Basil, bay, dill, fennel, hyssop, lavender, lemon balm, mint, oregano, rosemary, parsley, sage and thyme can be used for baking, cooking, seasoning or making tea.
- Meat and fish – Beef, chicken, cured meats and sliced meats like turkey can be added to soups and stews.

Food dehydration: Tools, slicing and blanching
You’ll need certain tools to cut food properly before you can process them.
Tools you’ll need
When preparing food for dehydration, each piece needs to have an even thickness so things can dehydrate at the same rate with a uniform end result. If you have uneven slices, the thicker pieces that haven’t dried fully can cause spoilage during storage.
To prevent this, use the following tools:
- An apple slicing device that can slice, peel and core fruits simultaneously. Look for a device without any plastic parts.
- A sharp, short paring knife and a hand peeler for peeling and cutting fruit and vegetables.
- A food processor or grater for slicing, dicing and chopping ingredients for snacks or soups and stews.
When slicing food, trim fruits and veggies to be dehydrated to 1/4- to 1/2-inch thick pieces for best results. Slice meat thinner if you can.
Blanching food
Blanching means pre-heating fruits, meats and veggies before putting them in a dehydrator. Vegetables that take longer to cook are often blanched to prevent flavor loss before drying.
To blanch vegetables, place them in the basket of a steamer and heat water beneath. Steam for two to five minutes or until the vegetables are heated to the center.
The following veggies should be blanched before being dehydrated:
- Asparagus, three to five minutes
- Broccoli, three to five minutes
- Cabbage, two to three minutes
- Carrots, three to four minutes
- Corn, one to three minutes
- Green beans, four to five minutes
- Peas, three 3 minutes
- Kale and spinach (only until wilted)

Tips for dehydrating fruits and vegetables
Check out the tips below so you can dehydrate fruits and veggies at home.
Dehydrating fruits
When dehydrating fruits, buy organic, high-quality produce or grow fruits at home to ensure that they’re free from pesticides and other harmful chemicals.
Pick ripe fruits. This is important because ripe fruit is at its peak sugar content, meaning you’ll have sweeter apple or banana chips when you’re done. You should also avoid bruised or overripe fruits because they might turn black while drying.
If you plan to leave the skin on, wash the fruit thoroughly then core or pit if necessary. Slice the fruits to an even thickness. Place the evenly sliced fruit on dehydrating trays, then dry at 135 to 145 F until pliable.
Apples, bananas, nectarines and peaches need at least six to 16 hours of drying time. Meanwhile, apricots, figs, grapes and pears require 20 to 36 hours. Check every two to three hours for the two groups and rotate trays if you need to.
Never add more fruit to a dehydrator while one batch is still being processed. The partially dried fruit will absorb moisture, which can ruin the whole batch.
Dehydrating vegetables
Vegetables dry more quickly than fruits. However, veggies also spoil more quickly.
When preparing vegetables, follow these useful tips to preserve freshness before drying:
- Store vegetables in the fridge.
- Use produce-saving paper.
- Prepare only as many vegetables as you can handle in one batch.
- Wash veggies in cold water.
- Remove tough pieces of skin or stem and cut away bruises and spots.
- Slice veggies to an even thickness using a food processor or spiralizer.
- Choose vegetables of smaller lengths over larger ones for speed drying.
- Blanch vegetables like broccoli or carrots before dehydrating.
- When placing veggies on dehydrator trays, leave enough space so each piece doesn’t overlap and dry at 125 F. Note that onions and tomatoes are best dried at 145 F.
- Drying times may vary from four to 10 hours, depending on the type of vegetable and the size of the sliced pieces.
- Avoid drying strong-smelling vegetables with milder smelling varieties. For example, Brussels sprouts, garlic, onions and peppers will leave their pungent scent in other milder vegetables.
Take the time to learn how to dehydrate food at home and familiarize yourself with the basics to save on groceries and preserve excess crops from your home garden!
Sources:


Advertisements
Food.News © 2022 All Rights Reserved. All content posted on this site is commentary or opinion and is protected under Free Speech. Food.News is not responsible for content written by contributing authors. The information on this site is provided for educational and entertainment purposes only. It is not intended as a substitute for professional advice of any kind. Food.News assumes no responsibility for the use or misuse of this material. Your use of this website indicates your agreement to these terms and those published on this site. All trademarks, registered trademarks and servicemarks mentioned on this site are the property of their respective owners.